Inspection Basics#
Creating a new inspection file#
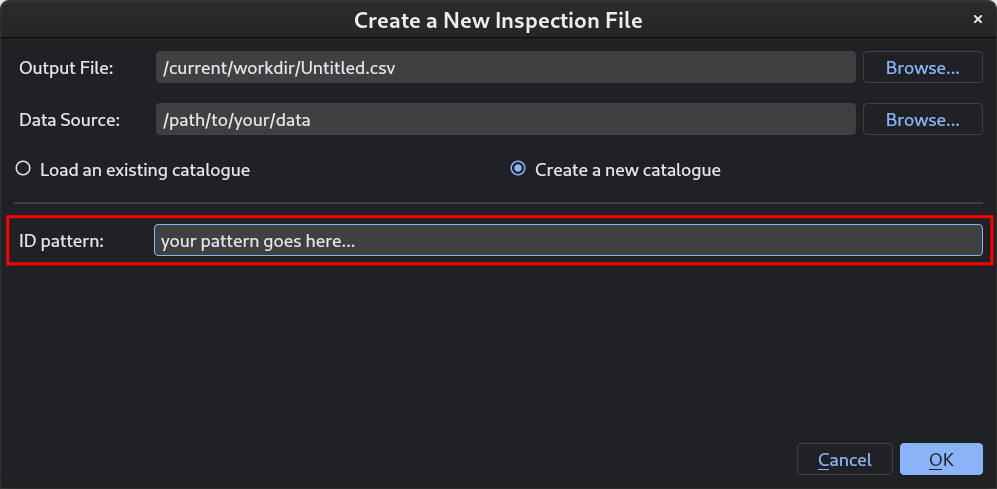
Every round of inspections starts with creating a new inspection file. To get started, navigate to :
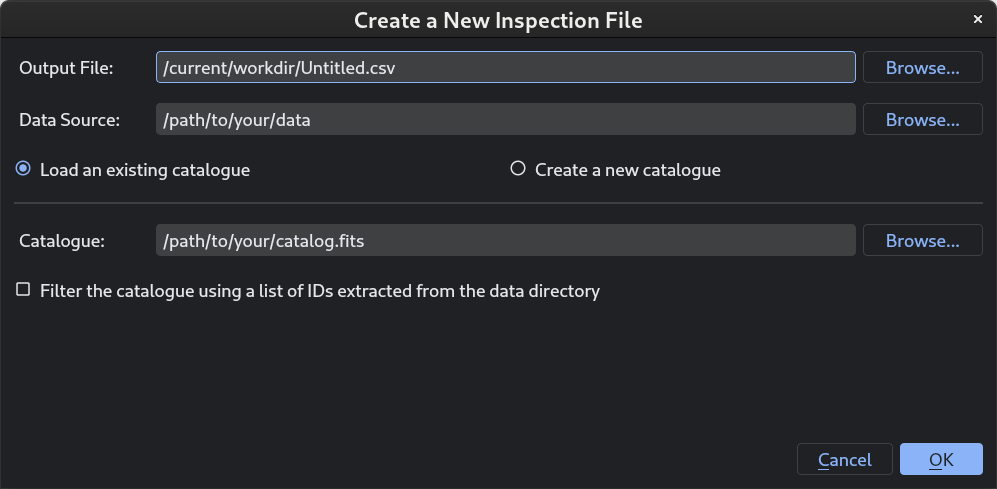
First, specify the name of the output file which specvizitor will use to store the results of inspections (redshifts, for example). This file will always have at least the following columns:
Column |
Description |
|---|---|
|
Object IDs |
|
|
|
Redshifts saved in Inspection Results |
|
Comments added in Inspection Results |
The output file (also known as the inspection file) is stored in the comma-separated values (CSV) format, enabling a quick access to inspection results from any text editor. Optionally, you can export inspection results as a FITS table (see Exporting a FITS table).
Second, specify the path to the data directory. The files stored in the data directory must respect the filename format defined in the widget configuration (see Data Viewer). By default, specvizitor assumes the Grizli filename format ({root}_{id:05d}.*.fits).
Tip
Currently, specvizitor only works with one data directory at a time. If your files are spread across multiple directories, consider moving them into a single directory.
Third, you can optionally specify the path to the catalog with some additional information about the objects you are inspecting (photometric redshifts, for example). This information will appear in Object Information in the main window.
Note
For Grizli data products, loading such catalog is necessary because specvizitor needs to know root to resolve their filenames.
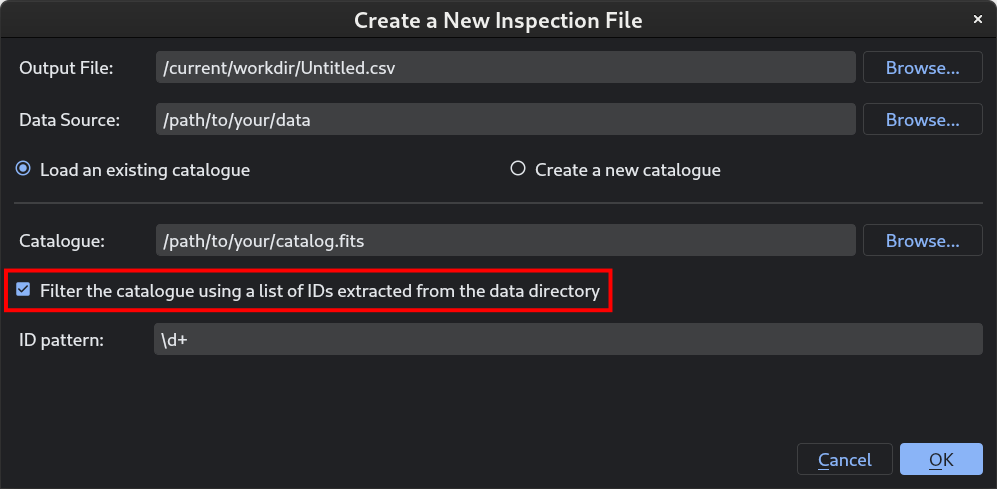
All IDs retrieved from the catalog will be included in the inspection file even if the respective data files are not found. To avoid adding IDs with no data to the inspection file, select the checkbox at the bottom of the window.
Note
Knowing that astronomical catalogs often use different names for the same columns (e.g., “id”, “ID”, “NUMBER”), a list of aliases for common column names has been added to specvizitor. This list is extensive but, by no means, exhaustive. Thankfully, you can always add more aliases in the settings (see Application Settings).
For some quick analyses, you can skip the catalog part by selecting Create a new catalog:
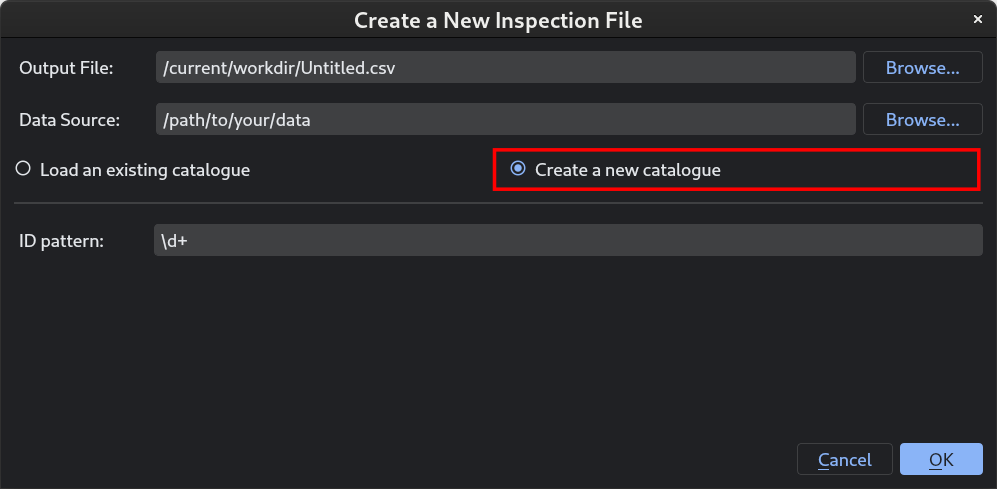
This creates a dummy catalog comprising a single column of object IDs that are automatically extracted from the filenames of files discovered in the data directory. For each filename, specvizitor extracts an ID by finding the longest substring of digits, which is done by matching a specific regular expression (RegEx) pattern (?<![0-9Ff])\d+(?![0-9Dd]) to the filename. You can change this behaviour by modifying the regex pattern in the same the window:
Note
Some features of the data viewer work only if certain columns are present in the catalog. In particular, cutouts from astronomical images can be created only if the catalog includes object coordinates (RA and Dec columns).
Once you have completed these steps, click OK. If there are no errors, a new inspection file will be created.
Adding inspection fields#
In specvizitor, you can create custom inspection fields to perform some additional classification besides just assigning a redshift, for example assigning a confidence level to redshifts or marking objects with some unusual properties. To create a new inspection field, navigate to ‣ Add… and specify the name of a new field:
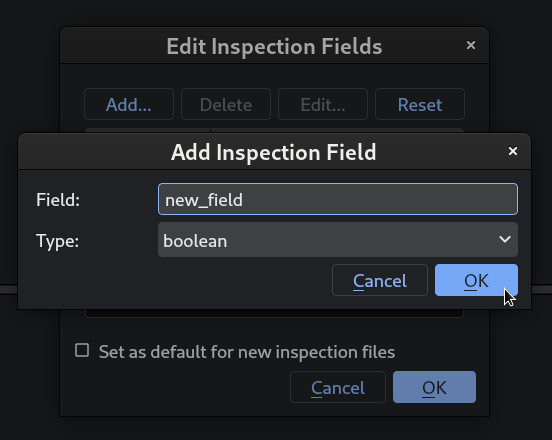
Click OK (twice). The new field will appear in Inspection Results:
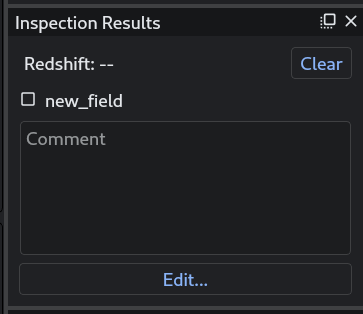
This field will also appear as a boolean column in the output file (*.csv).
Note
At any time, inspection fields can be renamed or deleted using the same editor. If you attempt to delete an inspection field that has some data, you will be prompted to confirm this action.
Saving inspection results#
The inspection results (*.csv) are saved automatically whenever you:
switch between objects;
exit the application (close the window, navigate to , or press Ctrl+Q).
By design, there is no manual way to save inspection results. The Ctrl+S shortcut updates the redshift in Inspection Results only, and for the *.csv file to be saved you still need to trigger one of the two events listed above.
Exporting a FITS table#
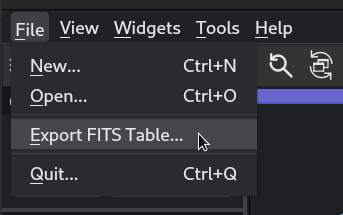
Sometimes it might be useful to export the inspection results (*.csv) as a FITS table (for example, to load them in Astropy). This can be done by navigating to and specifying the path to the output file: